Team & Permissions
Configure Custom Domain
How to configure a custom domain in FastGPT
FastGPT Cloud supports custom domain configuration starting from v4.14.4.
How to Configure a Custom Domain
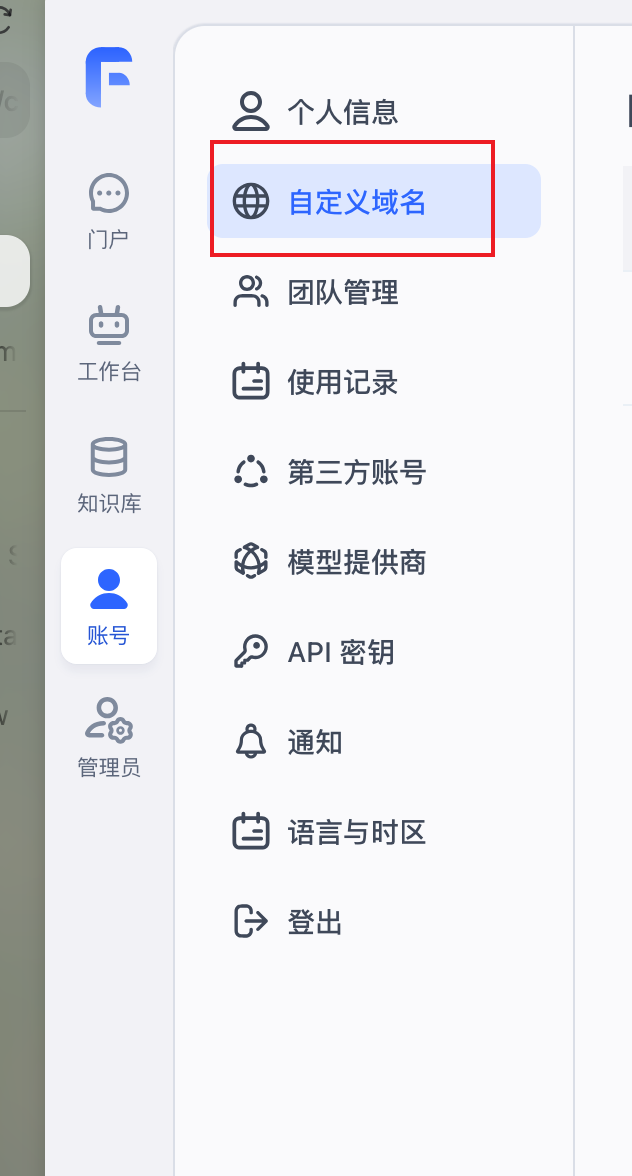
1. Open the "Custom Domain" Page
In the sidebar, go to "Account" -> "Custom Domain" to open the configuration page.
If your plan does not support this feature, follow the on-screen instructions to upgrade.
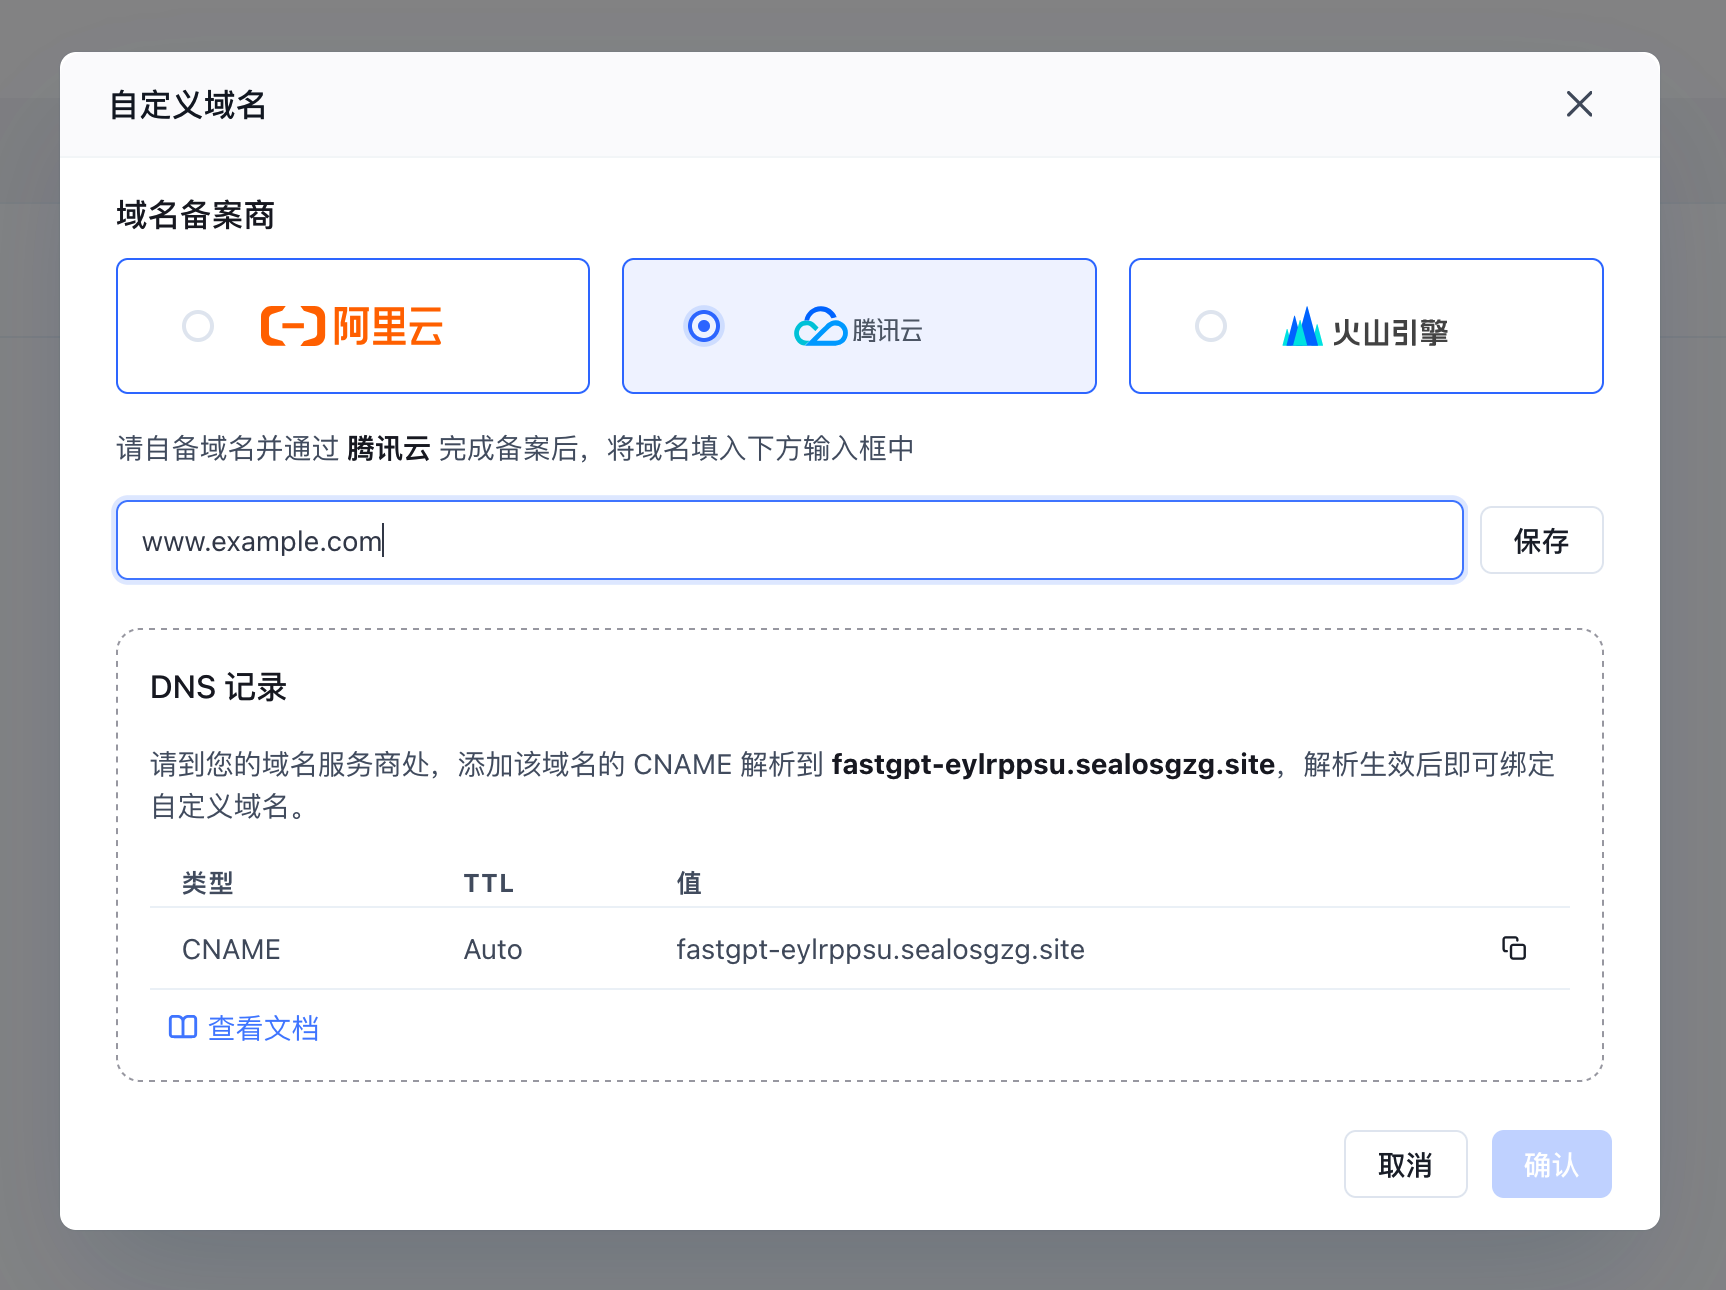
2. Add a Custom Domain
- Have your domain ready. Your domain must have an ICP filing. Currently supported filing providers are Alibaba Cloud, Tencent Cloud, and Volcano Engine.
- Click the "Edit" button to enter edit mode.
- Enter your domain, e.g. www.example.com
- In your domain provider's DNS management console, add the CNAME record shown on the screen.
- After adding the DNS record, click "Save". The system will automatically verify the DNS configuration -- this usually takes less than a minute. If verification takes too long, try again.
- Once the status shows "Active", click "Confirm" to finish.
You can now access FastGPT services and call FastGPT APIs using your own domain.
DNS Resolution Failure
The system checks DNS resolution daily. If the DNS record becomes invalid, the custom domain will be disabled. You can re-verify it by clicking "Edit" on the "Custom Domain" management page.

To change your custom domain or switch providers, delete the existing configuration and set it up again.
Use Cases
Edit on GitHub
File Updated